How to Create Tables in Pressbooks
For best results including tables in your book, use our Table Creator tool in the Visual Editor.
Go to Text / Organize and click on the chapter in which you would like to add a table.
Click on the toggle bar at the top right to show the full formatting toolbar.

Then use the Table Creator tool at the bottom left to create a table in your book.
Once you have created your table and filled it with text, you can add styles such as headings as you would normally, by highlighting the text and choosing a style from the dropdown menu in the toolbar.
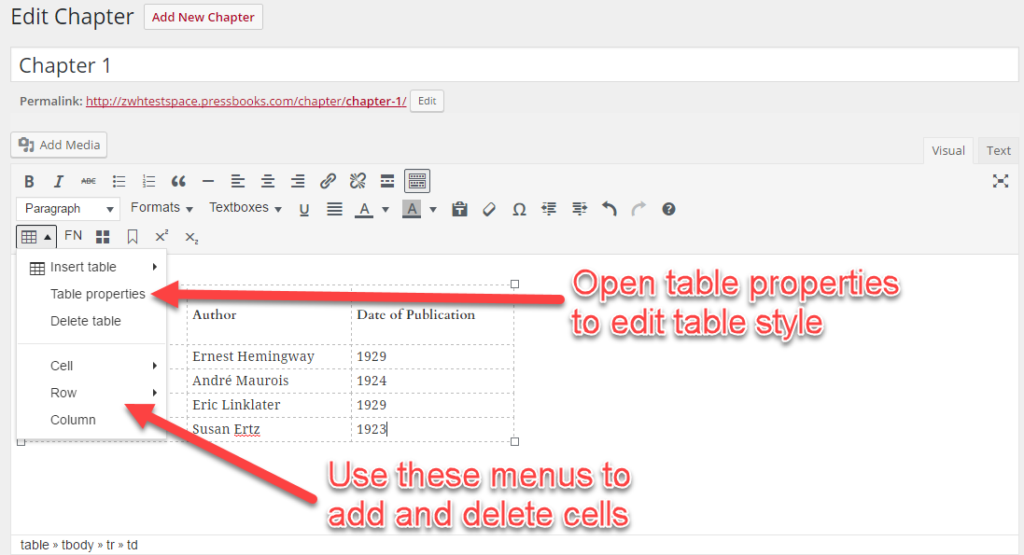
To edit the table in other ways, place your cursor in any cell and click on the Table Creator button once again. From this menu you can:
- Insert another table within a cell.
- Access the table properties (see below).
- Delete the entire table.
- Edit cell, row and column properties.
- Merge and split cells.
- Add and remove rows and columns.
- Copy, cut and paste rows and columns.

Table Properties
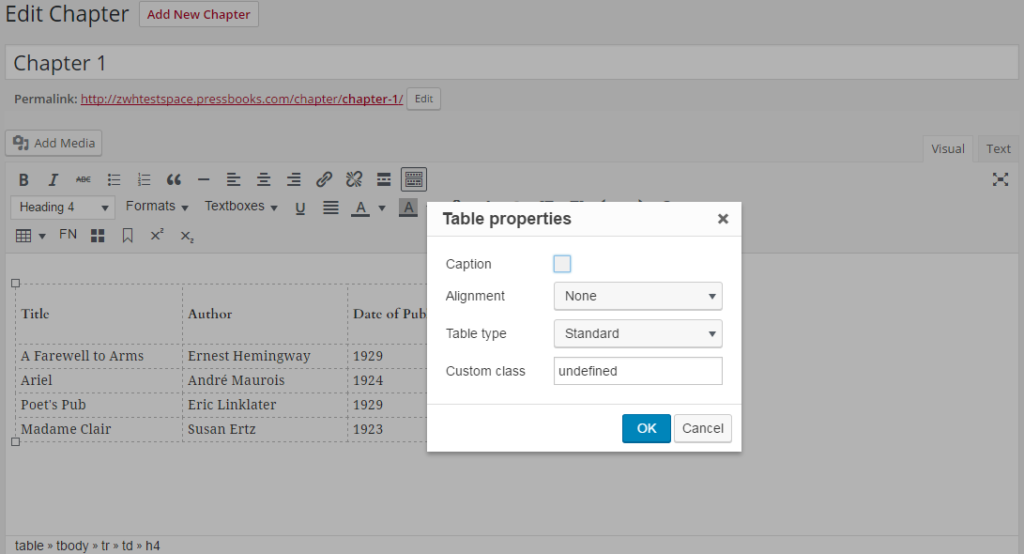
If you open the table properties window, you will see more options for how you want to display your table:
- Check “Caption” to add a caption (which is really more of a title or header).
- Change the table alignment on the page.
- Add simple styling from the “Table Type” menu.
- Add a custom CSS class to enable more styling from the CSS editor.

Copying Tables from Word
Tables should be clean and free of unnecessary mark-up in order to display correctly. Often, importing from Word brings in extra styling that can affect formatting. For best results, we recommend copying tables into the visual editor, without any in-line styling.
Prefer to watch and learn? Here’s a brief visual intro to adding tables and textboxes in Pressbooks.